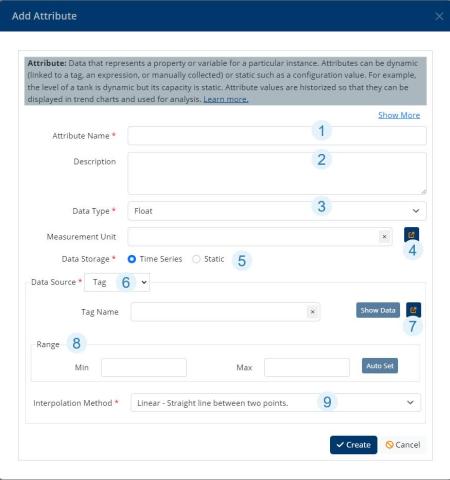
When the Data Source for an attribute is a Tag you can locate and select the data source for the tag from the attribute dialog.
- In the Model Explorer, navigate to the item for which you are mapping the tag.
- Open the Attributes tab and Add a new attribute or Edit an existing attribute.
- In the Add/Edit Attribute dialog, complete the basic information required by the form:
Add Attribute
1. Give the attribute a human-readable name that will be displayed throughout the platform.
2. Provide a description. Optional.
3. Declare the Data Type of the attribute using the drop-down list.
4. Select the Measurement Unit of the attribute. Use the pop-out link to select a unit.
5. Determine the Data Storage type. For tags, this should be Time Series.
6. Declare the Data Source using the drop-down list. For Time Series data, select Tag. (The options are Tag, Internal, Expression)
7. Use the pop-out link to browse the Model to select the tag data source.After selecting the tag, use the Show Data button to see the data being returned.
8. Set the acceptable Range for the data type. Once several days' data is in the system, you can use the Auto Set button to determine an operating range.
9. Determine the best Interpolation Method.

