The Smart Manufacturing Portal is built with a Landing Page and a Home Page. The Landing Page is a publicly accessible page that can be edited to meet several goals, including creating interest in your company. There are no menu items on the Landing Page. There is a Login link on the Landing Page for logging into the Portal.
The Home Page is the first page that a logged-in user will see. This page will contain site navigation and can be customized to display a range of different content.
The Landing Page and the Home Page can be customized in much the same manner. Qualified users can customize the Home Page and other existing custom pages from the front end of the site, using the edit gear to open an editor, or from the Admin Console of the site. The Landing Page can only be updated from the Admin Console.
Learn more about the structure of content on the site in this Overview.
Accessing the Home Page Article
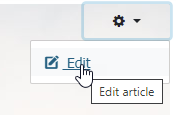
Custom content in the Portal is created in Articles – which are essentially web pages - that are linked to menu items for display on the site. The Home Page content is in an article named Home. Articles are edited using an editor that can be opened from the front end of the site via the edit gear at the top-right of the page:

The article editor has many buttons for inserting different elements into the page, including columns, images, links, tables, and more. When you have finished editing your page, click the Save button at the bottom of the form to close the editor and return the site.
In the Admin Console, navigate to Content->Articles and open the Home article.
Creating a new Home Page
The easiest way to experiment and create a new site home page is to make a copy of the existing home page, edit it as you like, and then replace the existing home page when you are ready to publish the page.
Copy the Existing Home page
Make a copy of the home page from the Admin Console. Open the Home article and use the dropdown next to the Save & Close button at the top to Save as Copy. Whenever you save a copy of an article you will notice a few things:
- The Title field with be updated with a (2) after the name
- The article Alias will append ‘-2’ to the alias. The alias is an important element in the CMS. It must always be unique – you will be warned if it isn’t – and it is used for building the navigation URL.
- The Status is Published – you may want to set to Unpublished while making changes, but leave as Published for now.
- The Access level will inherit the original article’s Access level. The access level determines which Access Levels can see the article on the front end of the site. Articles can be restricted to specific users or made accessible to anyone logged into the site. (See User Management to understand how site security works.)
- The article Category is also inherited.
Edit the Home page copy
There are many options for editing the Home page copy. You can add new copy, insert images, insert objects such as news feeds, create links to favorite internal or external pages. With time and experience, and depending on your license, you can add dashboards, live trends, KPIs and more.
For now, we will make a simple new Home page with an image and some text.
- In the Home (2) article, mark and delete all existing content. (Place mouse in page, click ctrl-A to select all, ctrl-C to cut)
- Click the image icon on the toolbar to open the image editor. You can browse folders for existing images, create a New Folder or Upload a new image. In the samples/homepage folder, select the process-layout.jpg – you will see an image of it in the right panel, and then, adjust the layout in the top area of the interface:
- Change left dimension to 600 and leave Proportional checked. Click in the width dimension to see the size auto-adjust
- Set Alignment dropdown to Left. While you are doing this, you can see how text will wrap around the image in the block on the top right.
- Uncheck the Equalize for the Margins and set Right to 15 and Bottom to 15.
- Click Insert
- Copy and paste a bunch of text into the editor. It can be tricky to see where your cursor is: highlight the image then click right below it – you will see a long cursor blink along the left side of the image. Use your right arrow key to move that long blinking line to the right side of the image. Insert your text now. The text will wrap around the image.
- Click Save (top left) to preserve your changes.
Create a Menu item for the new Page
- Duplicate your working browser tab so that two copies of the Admin Console open.
- Close the Home (2) article in one tab and in the left column, go to Menus->Custom.
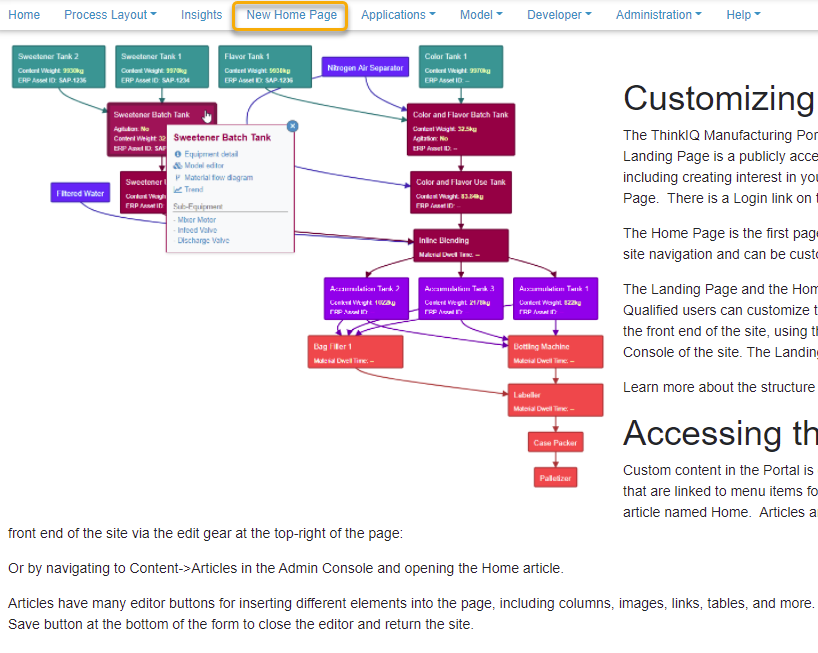
- Click the New button to add a menu item. Give the item a name: ‘New home page’
- Click Select next to Menu Item Type to select the type of item being created. Select Articles->Single Article.
- On the next line, select an article: click the Select button to choose the article Home (2.)
- Save
- Browse to the site (shortcut hint: from the Admin Console, click the name of the site in the top right of the page)
Find your new page name in the main menu and open it.
Replace default Home Page with new Home Page
Once satisfied with the new Home page content and look, replace the built-in home page with the new page in the Menu system.
- In the Admin Console return to Menus->Custom
- Click on the menu item Home to open the settings
- Select Clear in the Select Article setting, then click Select
- Choose Home (2) (or if you have renamed the page, choose the correct article)
- Save and Close
- Reload the Home page on the front end of the site.
- If you are happy with your changes, it is a good time to Delete the temporary New Home Page menu item:
- In Menus->Custom, click the check box next to New Home Page item, and then put it in the Trash using the Trash button at the top of the page.
Remove the Getting Started module
On a brand new system there is a module called Getting Started in the right hand column of the Home page. To remove the module:
- In the Admin Console, browse to Content->Site Modules
- Find the Getting Started module and either Unpublish it by unchecking the green Status arrow, or click the select box at the left of the module name and use the Actions dropdown menu at the top of the page to Trash the item. This will unpublish the module and remove it from the Modules list. (Modules that are Trashed can be recovered.)

